Completing a CAD tutorial for a 3D printed object
This week's assignment was to first find a CAD software tutorial and follow it to create a simple 3D model. Since I am using Onshape for this course, I found a tutorial posted by Maker's Muse on Youtube for designing and 3D printing a Redbull drink holder that would be placed in a car seat. Since redbull cans are typically smaller than average cans, they do not fit nicely in a typical car's drink holder and tend to flop around. So, some form of can adapter, that would fit into a car's drink holder, is required to hold the smaller cans in place. Below is an outline of my process for designing a creating an adapter for smaller cans.
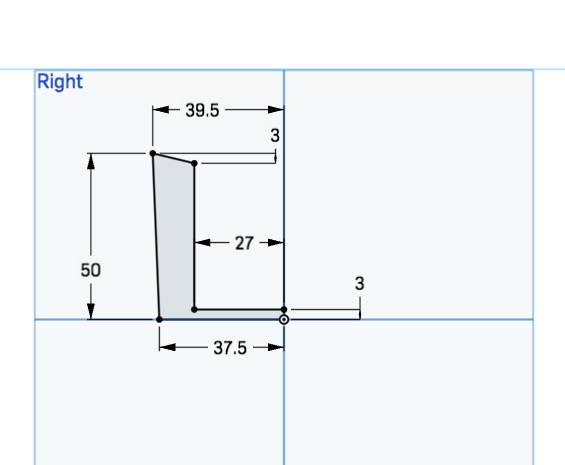
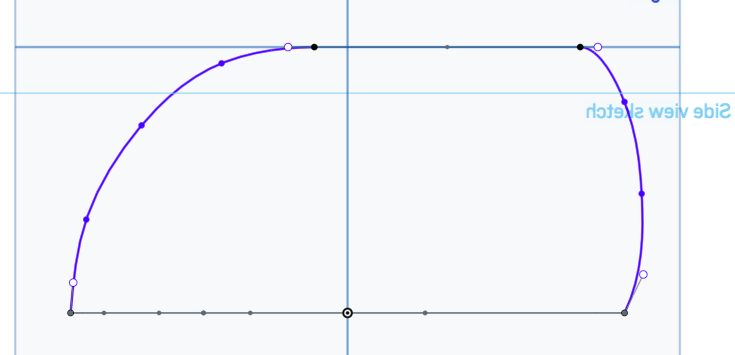
- First, I needed the dimensions of a typical car's drink holder and a redbull can. I used the measurements that were used in the tutorial. Using Onshape, I created a sketch on the side plane of the side part that would later be revolved around an axis to create an open cylindrical shape. sketched out what base pieces I would need to design to create a sphere. This shape tapers a bit (i.e. is thicker arond the top than the bottom) in order to account for shape of the car's holder. I first used the line function to randomly draw the shape required (looks like an odd L shape). I then used the dimension tool to change my shape into the dimensions used in the tutorial. See image of sketch with dimensions below. I then locked the 2d sketch to the origin using the coincident tool.
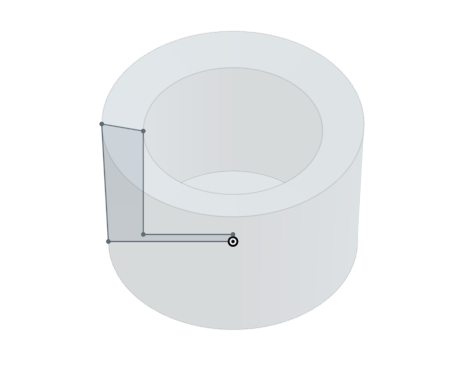
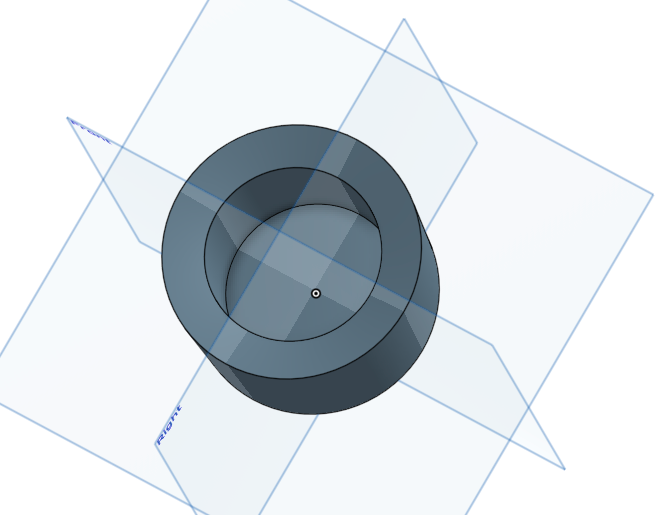
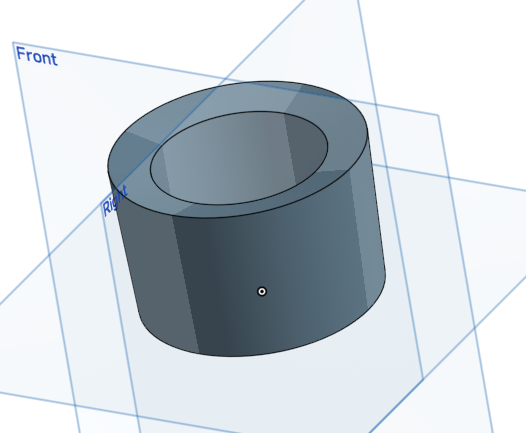
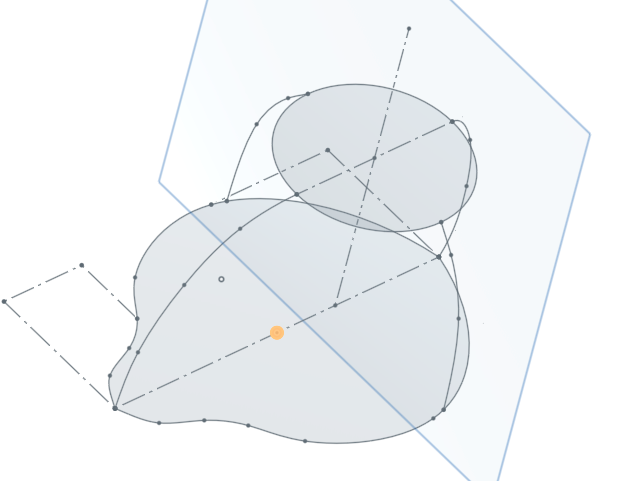
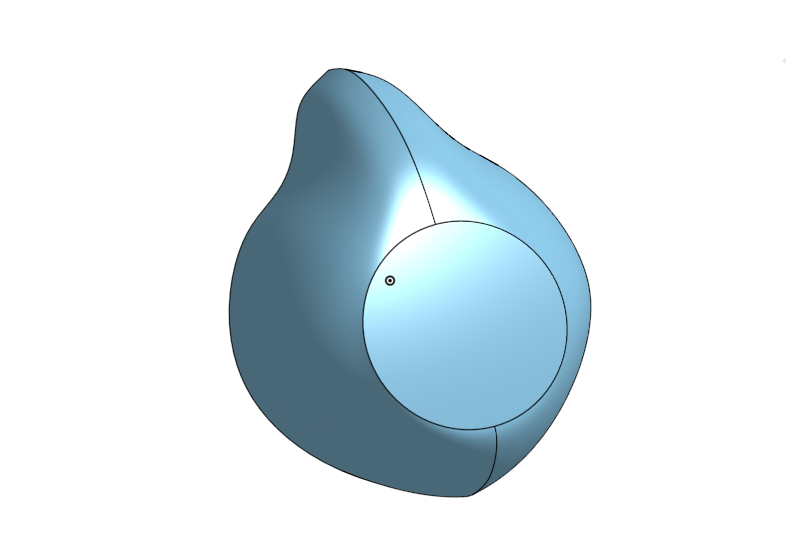
- Next, I used the revolve tool to turn the cutaway sketch into a cylindrical shape. I defined the face of the sketch to be revolved and selected the bottom right vertical line as the revolve axis to create the part. Using these few steps, I created the can adapter. See model of final product below.
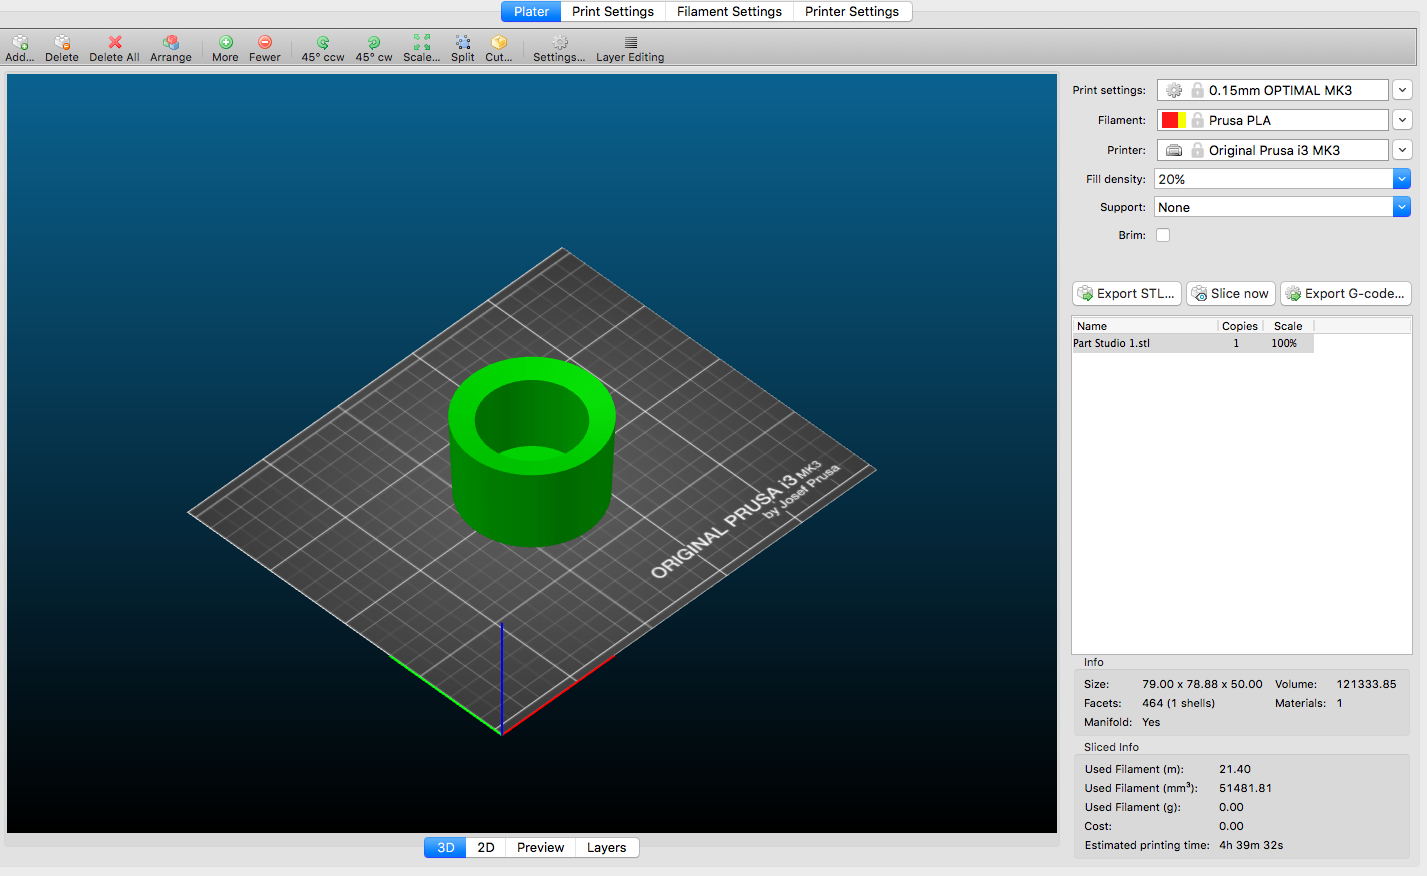
- After exporting my part, I imported the STL file into the PrusaSlicer program. After the slicing was finished, I exported the g-code and recorded the sliced info. I made note of the estimated printing time of the my can adapter: 4hr and 39mins.
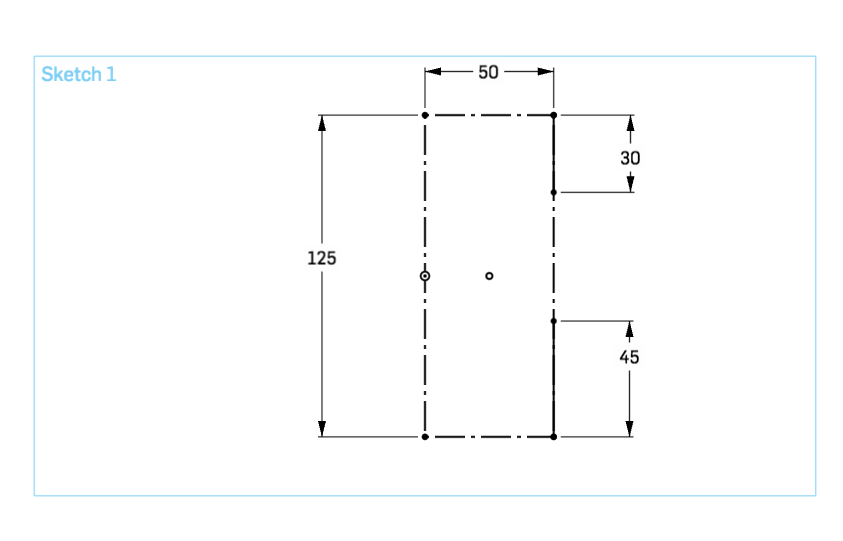
- First, I began with a basic rectangular sketch on the top plane with dimensions of 50mm wide and 125mm high. I then made all four sides of the rectangle to be construction lines that I would use as guides to design the mask shape in 2D. I then sketched two lines: one 45mm extending up from the bottom right vertex and the other of 30mm going down from the top right vertex. At the ends of both these lines, I sketched two horizontal lines going in (25mm wide).
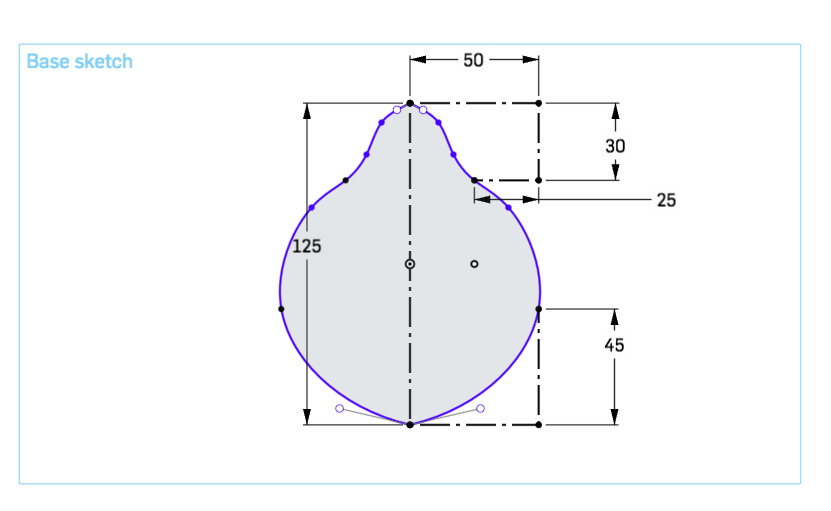
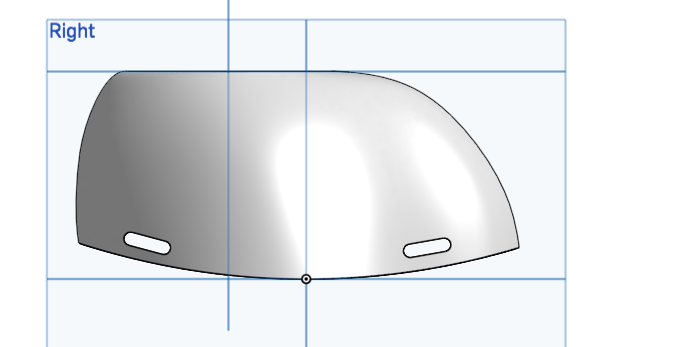
- Next, I used the spline to draw a curved line that resembles the shape of one half of a mask (the other half would be a mirror of this shape). I adjusted the spline points where necessary to make the shape look more like a mask that would fit comfortably over my face. I mirrored this half across the left vertical side of the initial rectangle.
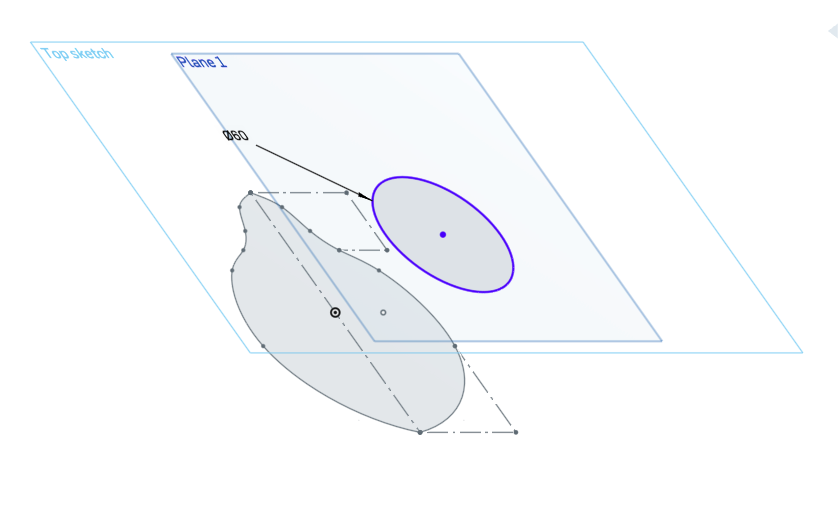
- Then, I created a second plane above the top plane to design the base shape of the mask. To do this, I created an offset plane coming off of the base sketch by 60mm. This resembles the width of the mask that could be changed for different face sizes. On this offset plane, I sketched a center-point circle that would become the mouthpiece of the mask. I drew a circle straight down from the origin with 60mm in diameter.
- To connect sketches on both planes together, I used the spline tool. I drew a spline from the bottom sketch to connect it to the top circle and used the pierce tool and tangent tool to make sure the line connects to the circle. I did this on both the top and bottom ends of the base sketch.
- Next, I created a new plane going down through the center of the top circle. I drew a construction line from the top of the circle to the bottom of the circle. Then, I created a point normal plane from the line and bottom edge. With this new plane, I sketched the side view of the mask. I drew another spline to connect the top and bottom edges of the circle to the base sketch. With this, I have a complete outline of what the mask is going to look like.
- I use the loft command to transform the 2D mask sketch into a 3D representation. I made sure to add the guidelines I created to the loft command.
- To create the mouthpiece and a place for a filter, I used the extrude command to remove the inner circle and push it 8mm down. I hollowed out the inner part of the mask using the shell command to create a shell thickness of 1.5mm.
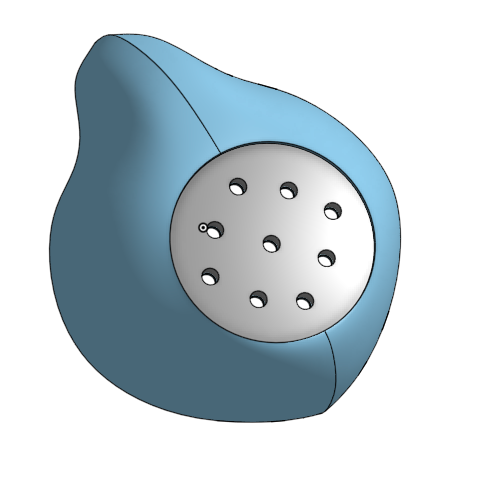
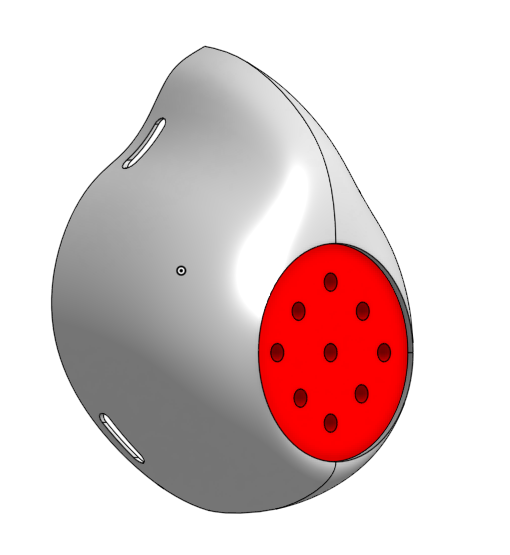
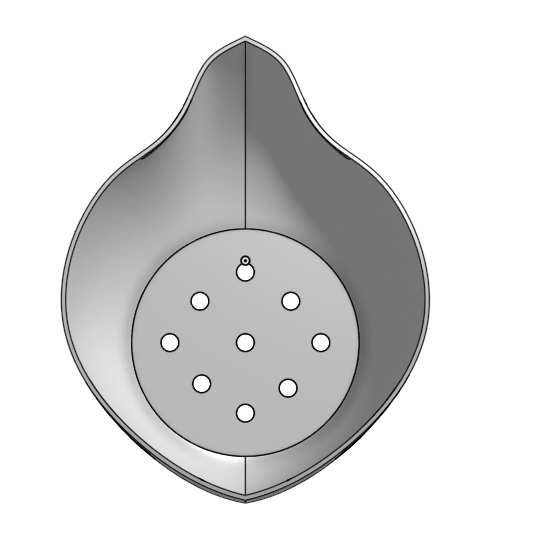
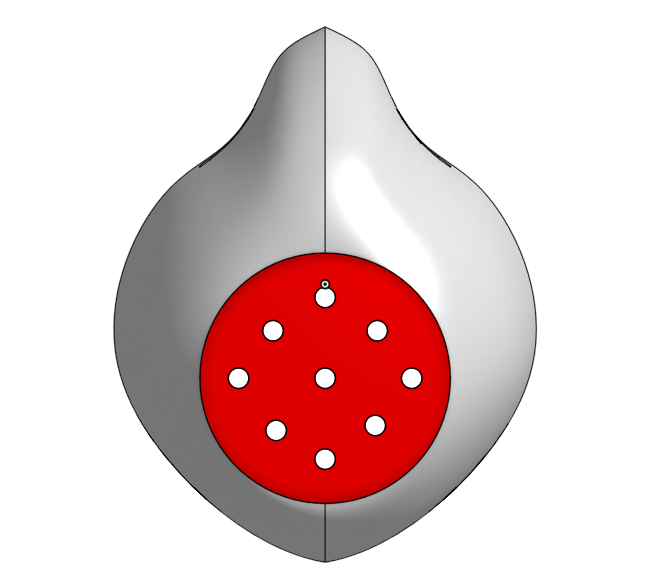
- To make breathing holes in the mouthpiece, I sketched a pattern of circles of 5mm in diameter. I then used the extrude tool to remove the spaces. I extruded this face by 6mm to create a new mouthpiece part.
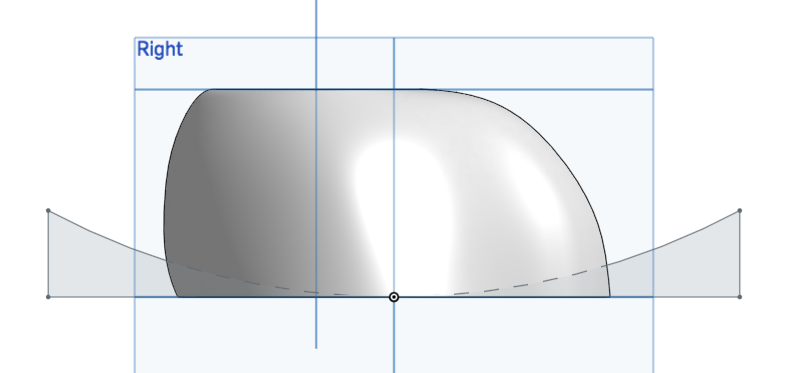
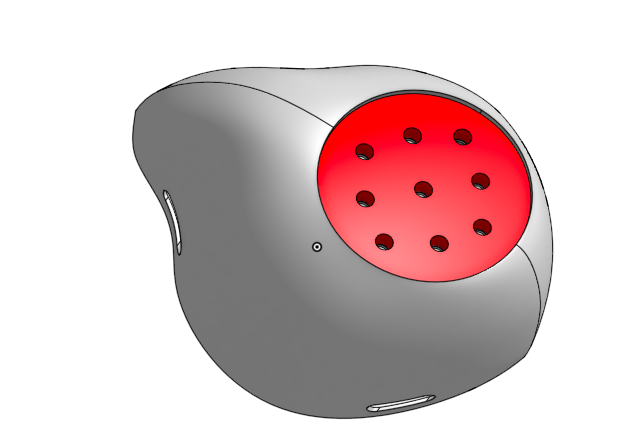
- I changed the appearance of both parts to a white and red palette. I then wanted to make the bottom part of the shape curved to fit more comfortably on my face. I drew a basic sketch on the side plane of a three-point arc. I then extruded this out symmetrically to round the inner part of the mask.
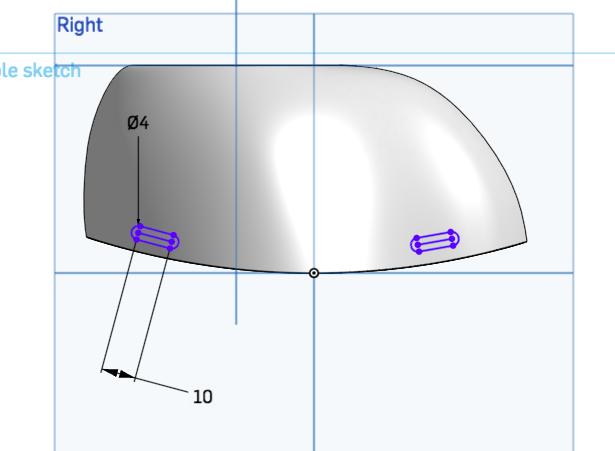
- I then added two slots that would be the holes of the head bands. I then extruded these symmetrically to create slots of 4mm wide on both sides of the mask.
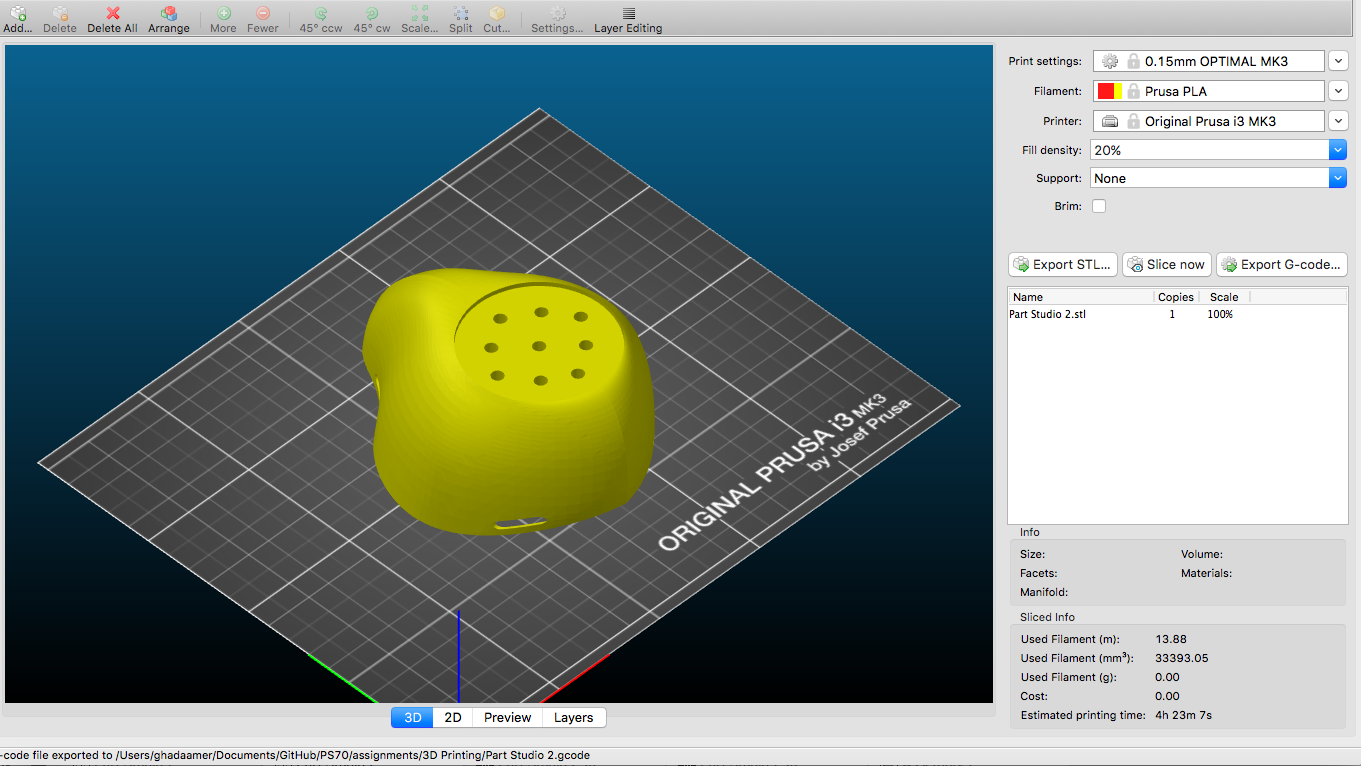
- I imported the final model into PrusaSlicer. Estimated printing time of one mask is 4hr and 23mins.
Initial side part
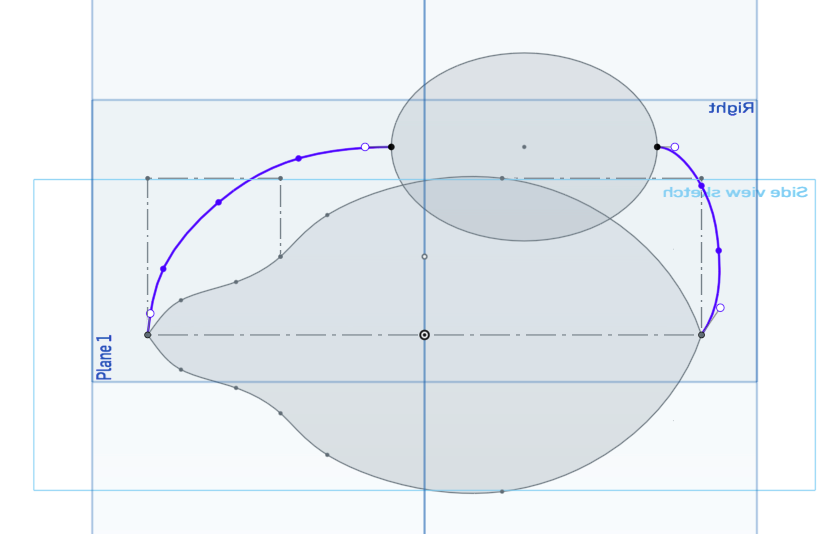
Transparent 3D model of Redbull can adapter with initial 2D sketch
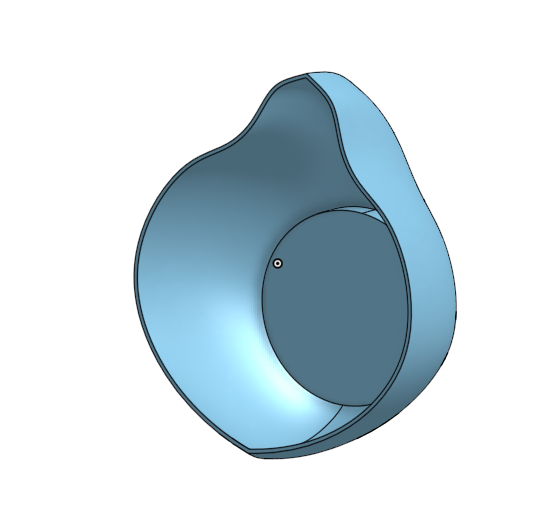
Different views of the final model
Sliced 3D Model with sliced information
The relevant files are available below for download:
Designing my own 3D printed object: Coronavirus face mask
The second task for this week was to design and print a small object that would be difficult to make using subtractive methods. Given the current circumstances as a result of COVID-19, I decided to create a 3D model of a face mask that could be 3D printed to combat shortages of such personal protective equipment. The advantages of making masks through 3D printing are many. Theoretically, individuals with single 3D printing devices would be able to make a large quantity of masks in their own home relatively easily and cheaply. In situations such as a pandemic, 3D printers could help offset shortages in safety gear by allowing people, with access to a model like the one I made, make home-made protective equipment. Below is an outline of my process for designing and creating model of a face mask that would be then sliced and 3D printed. The measurements used here would create are approximate and suitable for my facial features.
Construction guidelines for mask sketch
Initial sketch of mask shape in 2D
Offset plane with sketch for mouthpiece
Connecting base sketch to mouthpiece sketch
Connecting base sketch to mouthpiece sketch
Loft command for basic 3D shape
Mouthpiece, filter and hollowed inner shell

Mouthpiece extrude
Curved inner part
Slots for mask band
Final model of coronavirus face mask
Sliced mask model
The relevant files are available below for download: