The Assignment
This week's assignment was to program an Arduino board to do something.
Initial Problems
This week, I began by encountering various problems. I had issues with installing the Adafruit packages and could not upload anything to my board. After trying out many fixes and not succeeding, I decided to switch from the Itsy Bitsy to using the Arduino Uno board. I had to download extra drivers to communicate with the board and ultimately resolved my problem.
First Attempts at Programmming the Arduino Uno
Since I've never used a microcontroller before, I tried same basic programming projects for beginners. I outline each of these projects in what follows.
Project 1: Blink an LED
Since I faced issues with downloading the hardware, I decided to retry the assignment from the first weeek of class that involves making an LED blink. To do this, I completed the following steps:
- I built a simple circuit by inserting a jumper into GND pin on the Arduino and then in the GND rail of the breadboard. I then inserted another jumper wire into pin 13 on the Arduino and then the other end in the breadboard.
- I placed both the red LED and a 220 Ohm resistor into the breadboard. I placed the long leg of the LED into ground.
- I then connected the Arduino Uno to my computer via the USB cable. I found the blink sketch in examples section and uploaded it to my board.
- The program successfully executed. The red LED on the breadboard turns on for a second and then off for a second and continues in a loop. See gif below.
Project 2: Changing Blink sketch code
After making the LED blink, I decided to start playing around with the code to change the blinking speed. To do this, I did the following:
- I changed the delay portion of the sketch to 200. This made the LED blink much faster than before. Code as follows: void loop() { digitalWrite(LED_BUILTIN, HIGH); delay(200); digitalWrite(LED_BUILTIN, LOW); delay(200);}
- I then tried to make the LED blink for longer with a shorter stop time in between. To do this, I changed the first delay to (200) and the second to a (1000). This gave me a long red blink followed by a short stop flash. Code as follows: void loop() { digitalWrite(LED_BUILTIN, HIGH); delay(200); digitalWrite(LED_BUILTIN, LOW); delay(1000);}
- The program successfully executed. The red LED on the breadboard turns on for a second and then off for a second and continues in a loop. See gif beblow.
Project 3: Blink LED with a switch
I decided to use a small pushbutton switch to control an LED. To do this, I created a new circuit with the following steps:
- I connected a jumper wire from GND to the breadboard near A13. I then added another jumper wire from this GND rail to H19. I connected another wire from the power on the breadboard to around H26.
- I connected another jumper wire from pin 2 to around J24. I placed a 10k ohm resistor too between G19 and G23. I then placed the pushbutton switch into F23 and a 220 ohm resistor.
- I instered the short leg of the blue LED in the GND rail and the long leg around B5.
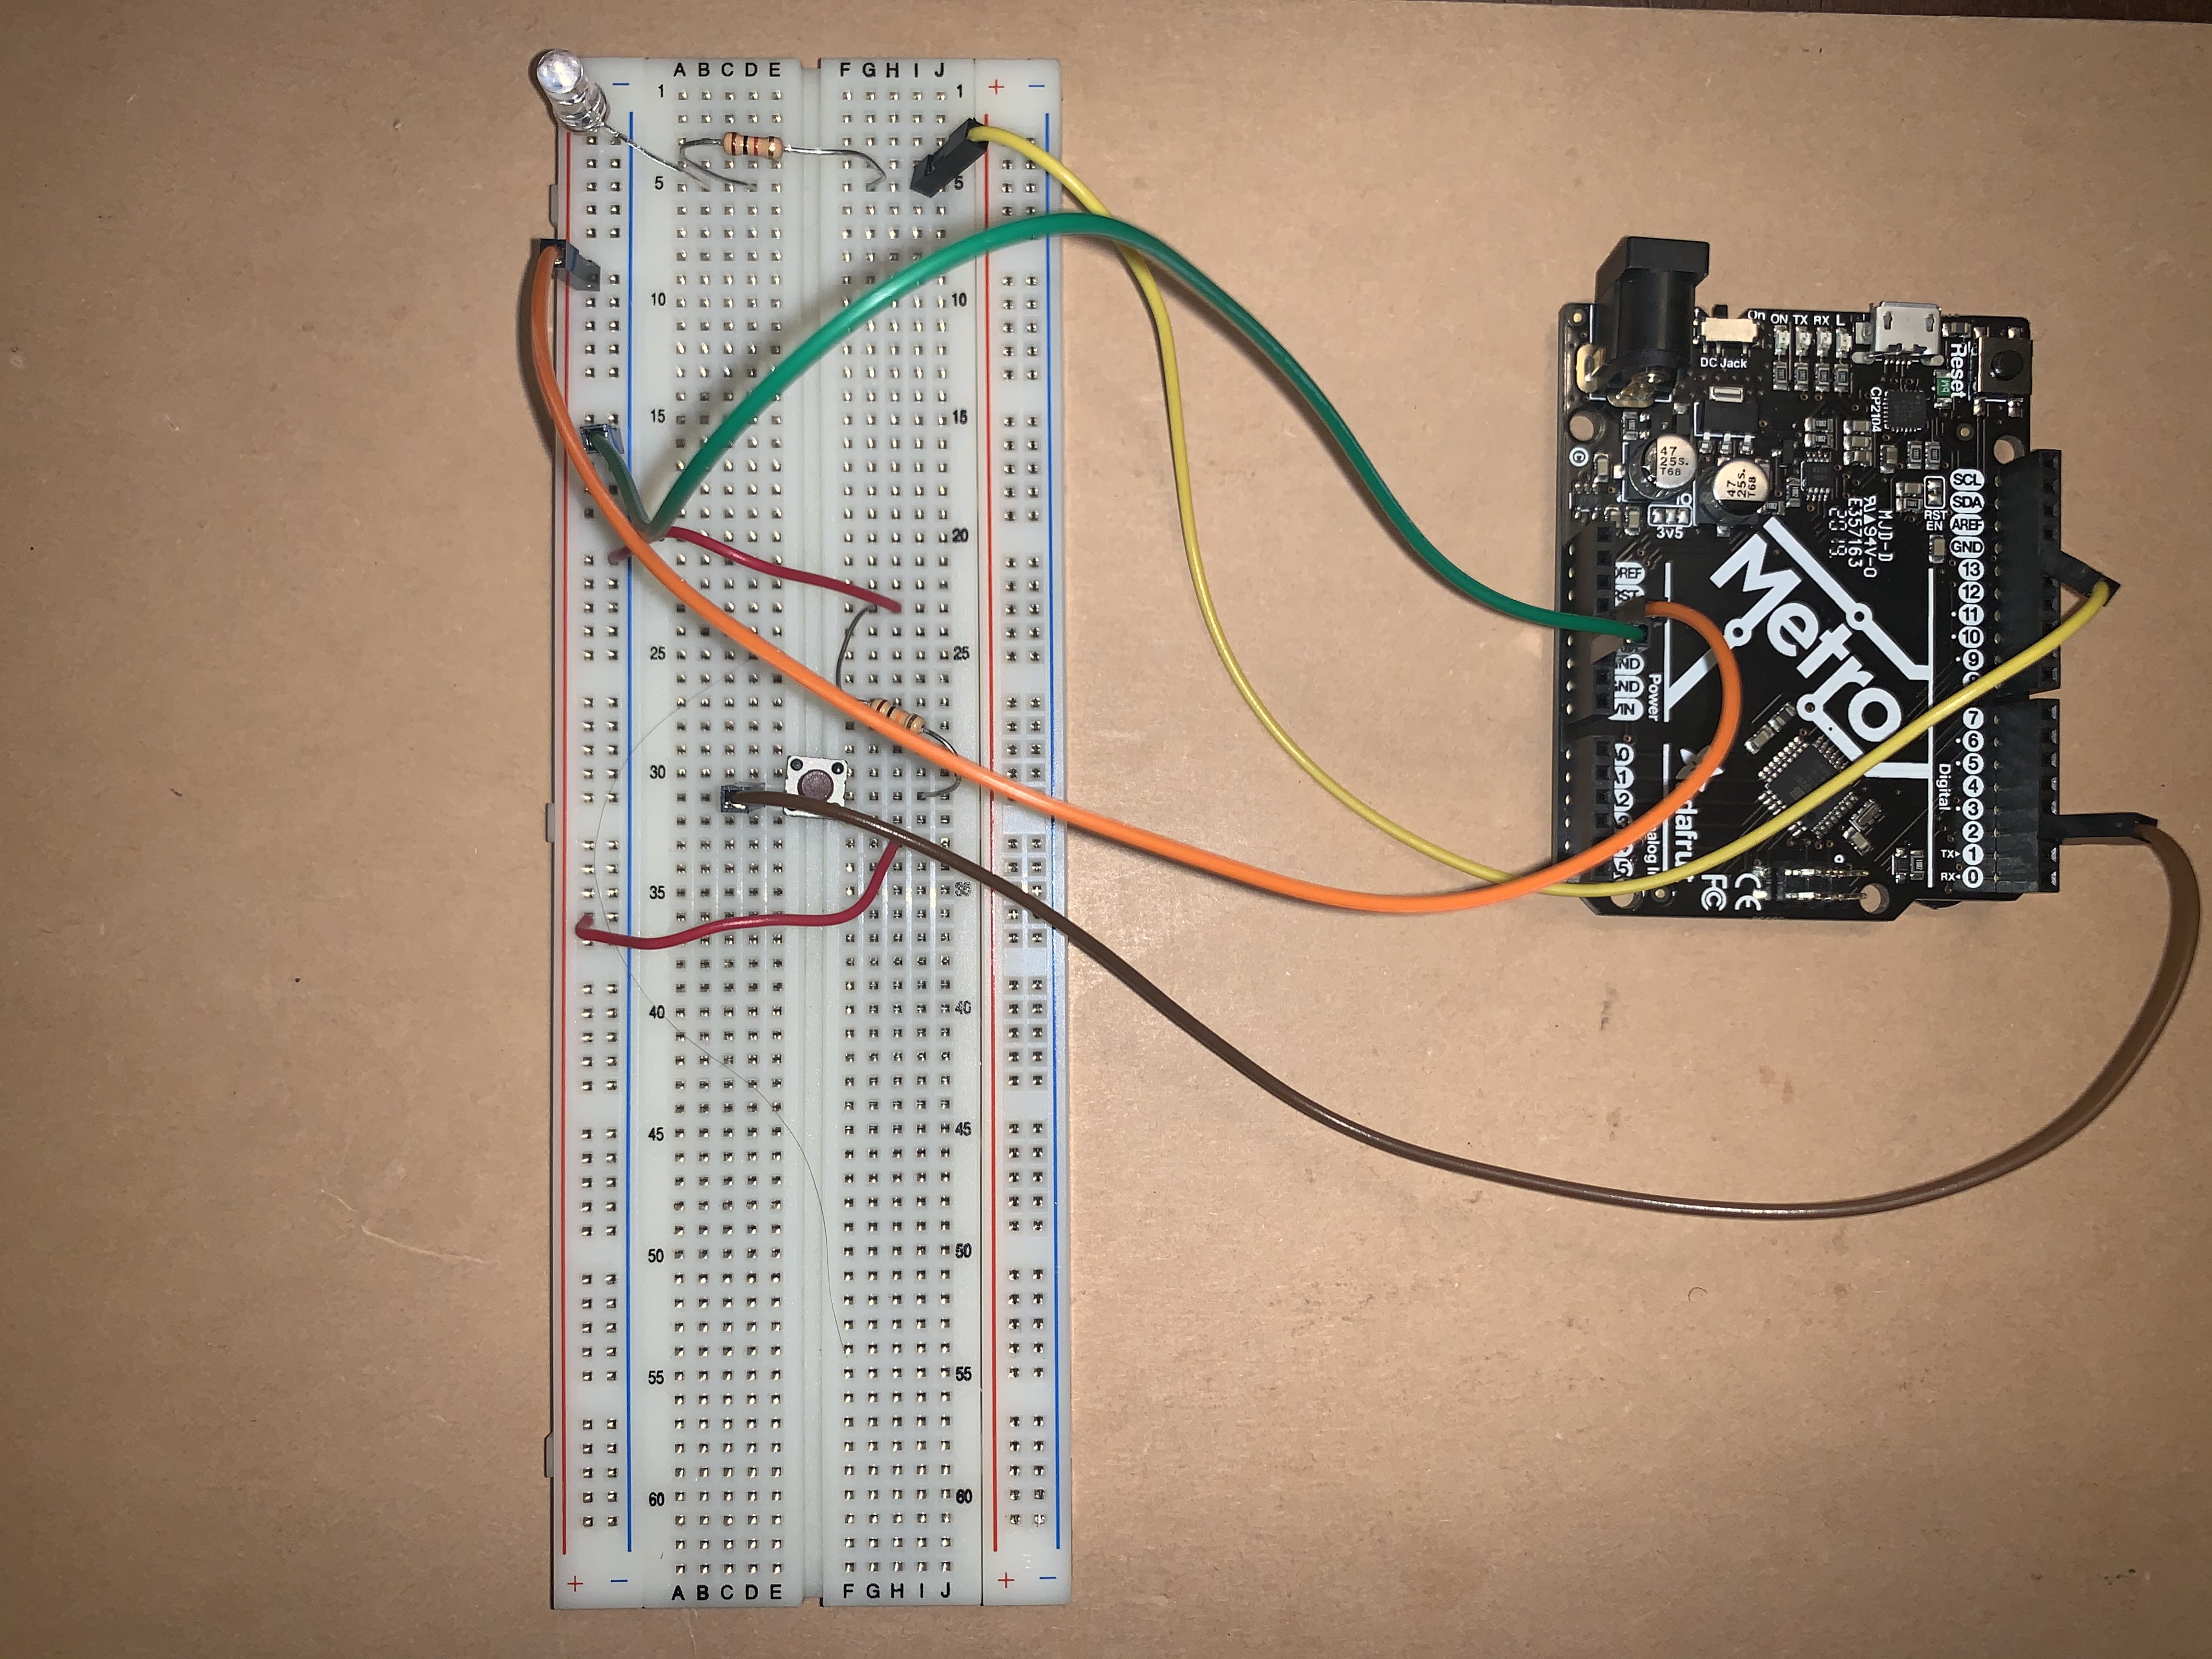
- I connected a wire from pin 13 to I5 on the breadboard and another wire from %v to the power rail near A8. I connected the Arduino Uno to my computer and uploaded a sketch to switch the button. The sketch is from the examples folder: file > examples > digital > button.
- Gif below shows me pressing the pushbutton. Upon pressing it, the circuit breaks and the LED remains off until I let go.
- Code as follows: // const int buttonPin = 2; const int ledPin = 13; / // variables will change: int buttonState = 0; void setup() { // initialize the LED pin as an output: pinMode(ledPin, OUTPUT); // initialize the pushbutton pin as an input: pinMode(buttonPin, INPUT); } void loop() { // read the state of the pushbutton value: buttonState = digitalRead(buttonPin); if (buttonState == HIGH) { // turn LED on: digitalWrite(ledPin, HIGH); } else { // turn LED off: digitalWrite(ledPin, LOW); } }
Picture of complete circuit: