The Assignment
This week's assignment was to demonstrate communication between a microcontroller and another device over Bluetooth or WiFi connection. I was interested in learning all the different things I could do with the Huzzah microcontroller so I decided to try out the tutorials on the class page that I would likely use for my ifnal project: local and remote servers. Below I outline my progress with each of the twp projects. I first began by configuring Arduino IDE to work with the Huzzah. So I downloaded the relevant drivers and boards. In the following projects, I'll be working with the Adafruit ESP32 Feather.
Project 1: Local Area Network Server
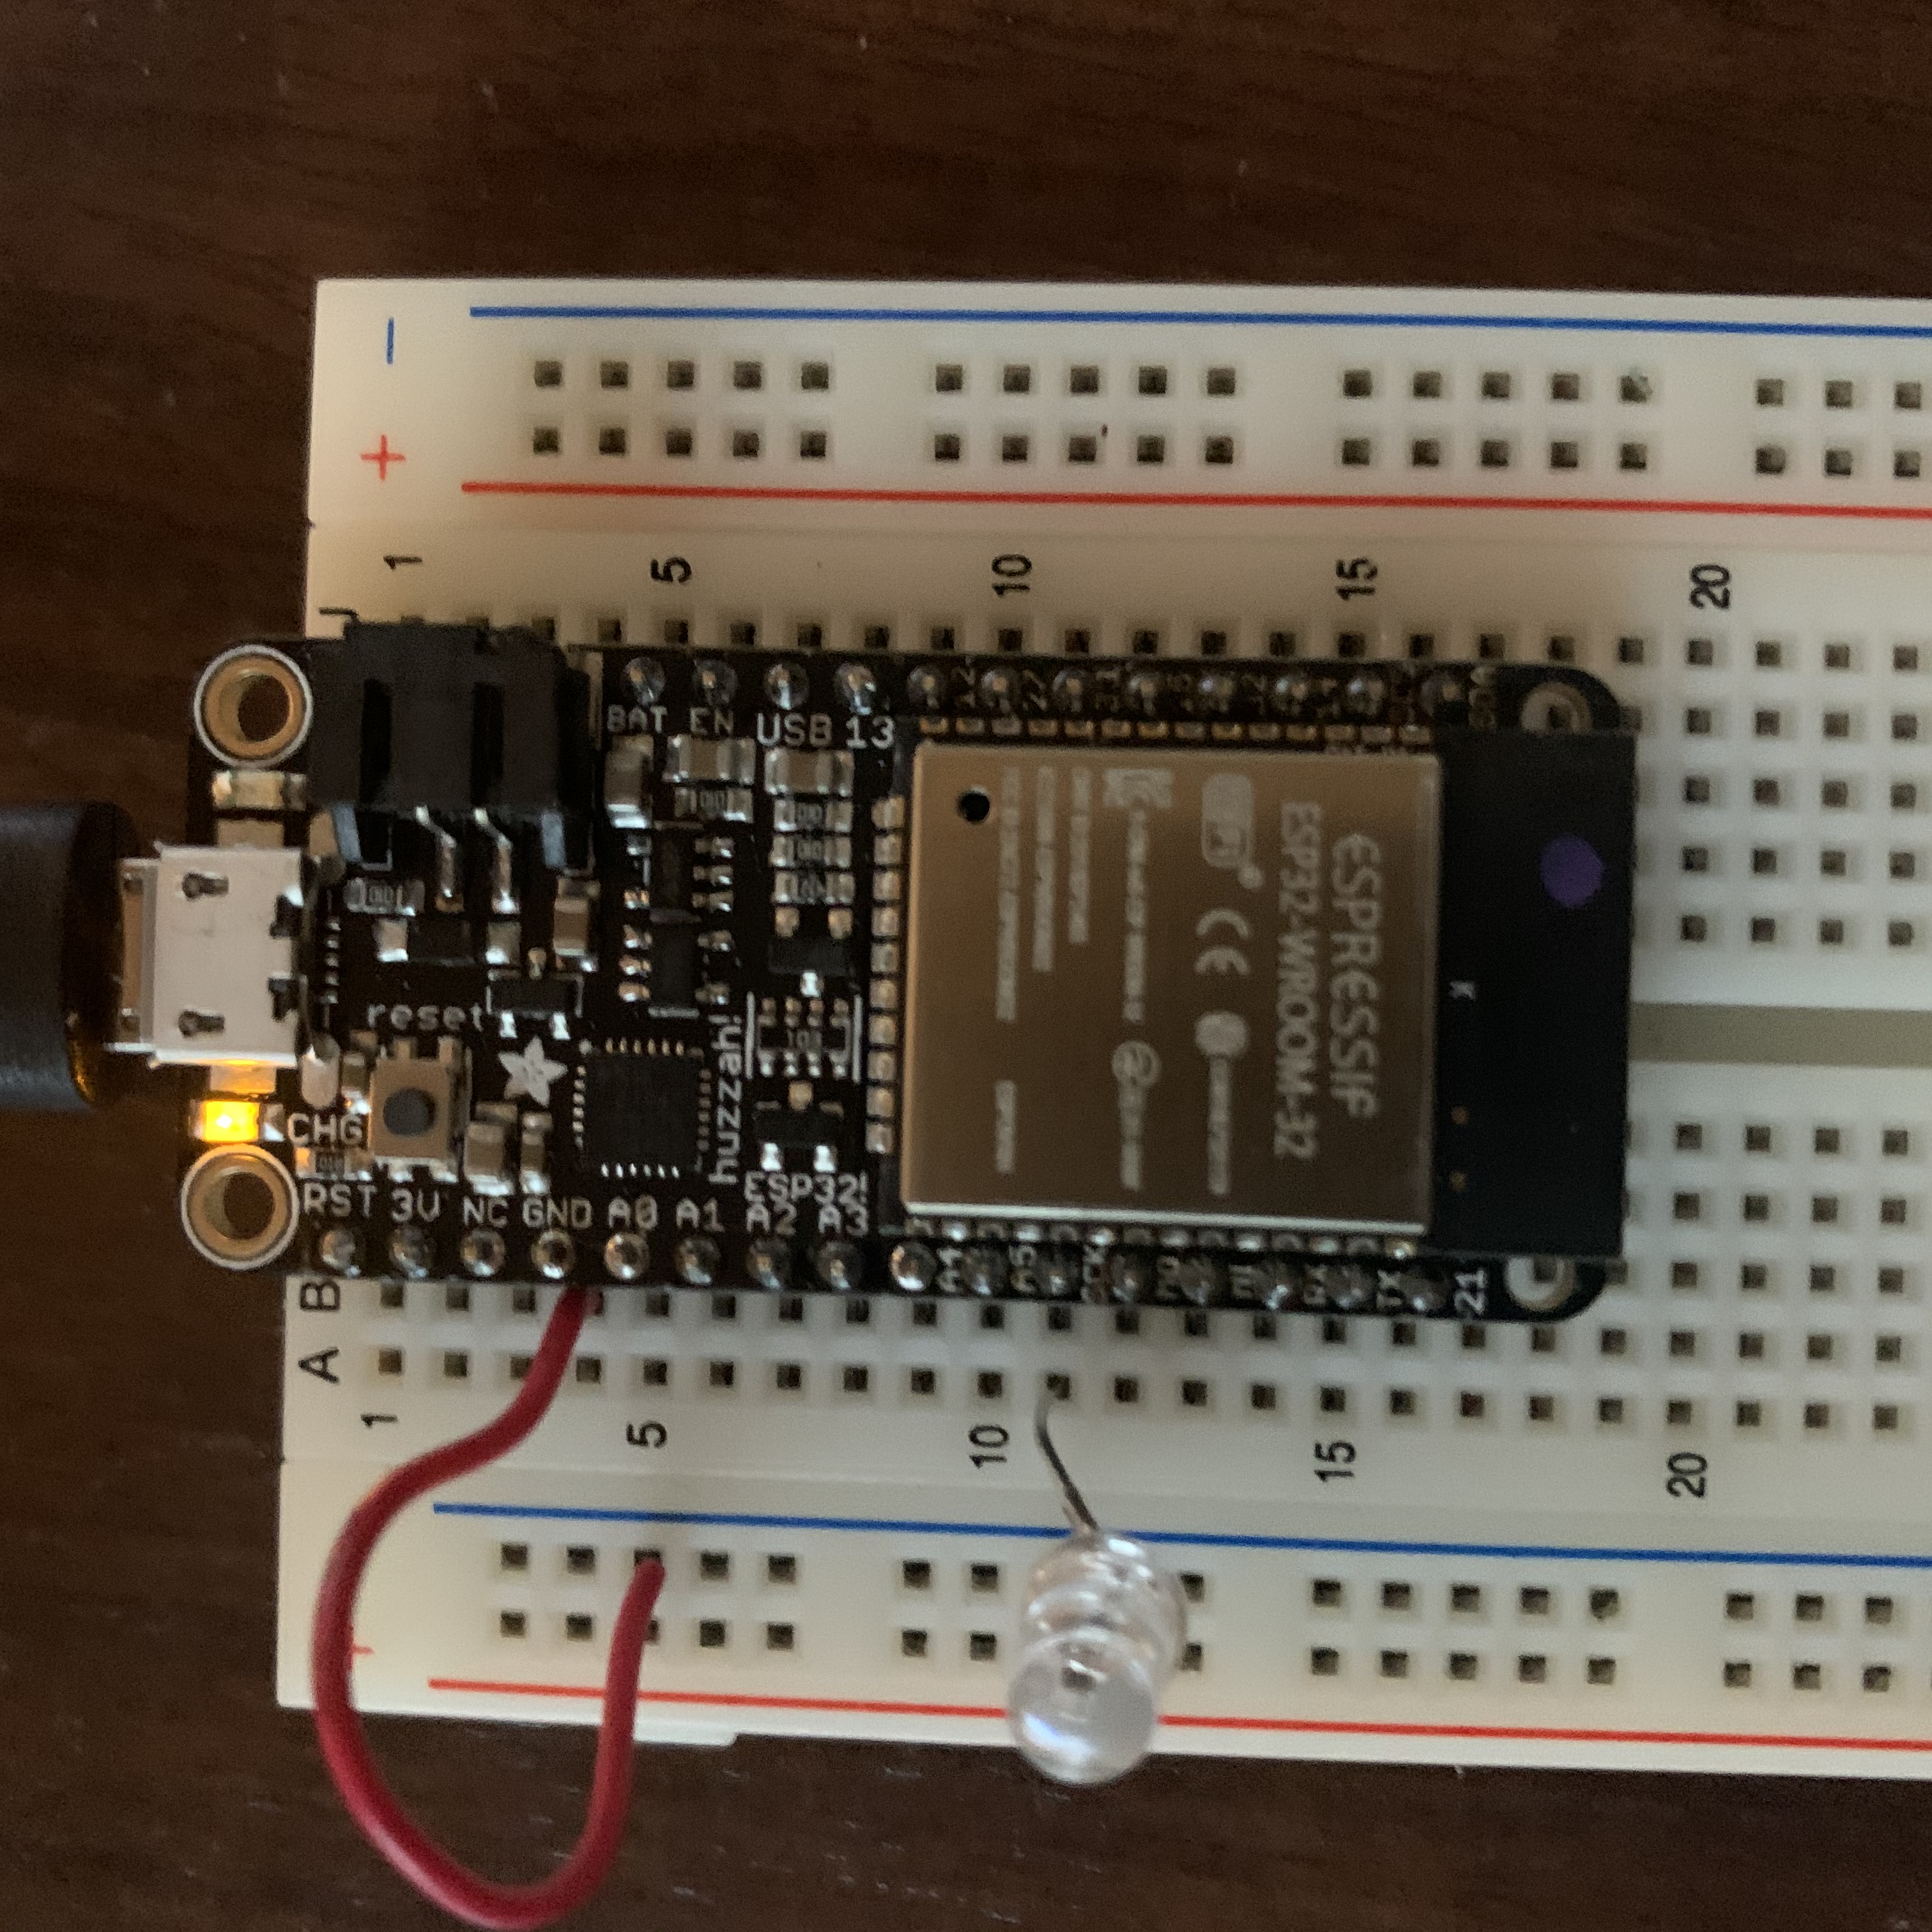
In this project, I created the simple Wifi server to blink an LED on and off wirelessly. To do this, I connected the long end of an LED to output pin SCK/pin 5 on the Huzzah attached to a breadboard. I connected a wire from GND pin on the Huzzah to negative rail of the breadboard. I connective short end of the LED to the GND rail on breadboard. To communicuate with the LED wirelessly, I did the following:
- I uploaded an example sketch from File > Examples > Examples for Adafruit ESP32 Feather > WiFi > SimpleWifiServer.
- I changed the ssid and password constants to my own.
- I uploaded the sketch to the Huzzah.
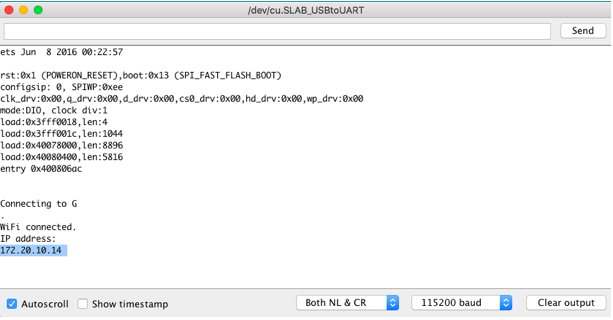
- I then loaded the Serial Monitor from the Arduino tools dropdown menu. I pressed the reset button on my Huzzah to load the monitor.
- At first, I was having issues as nothing was showing up on the serial monitor after many resets. I changed the baud selection on the Serial monitor to 115200 baud to correspond with the Serial.begin(115200) of my simple wifi server sketch and it worked.
- I then copied the IP address (highlighted in image below) to my web browser.
- On the page loaded, I pressed the links to turn the LED on and off as shown in video below.
- First, I created a reactive database on Firebase with the steps detailed on the course page. I created a new project titled ESP32-LED and made sure to record the secret key to give the Huzzah board (jZic7bMDi6Z7IjLvPBnt7yX4WfCPchUaWNXz4Znr) and the auto-generated URL/project address (esp32-led-c8c3b.firebaseio.com).
- I then used the same circuit as above with LED attached to pin 5. On Arduino's library manager (via Sketch > Include Library > Manage Libraries), I installed the Firebase ESP32 Client and the ArduinoJson library.
- Next, I modified the SimpleWifi Server code from earlier as detailed on the course page. I made sure to change the code chunks to my own ssid, password, firebase host, and firebase authorization key. My modified wifi server code looks like this:
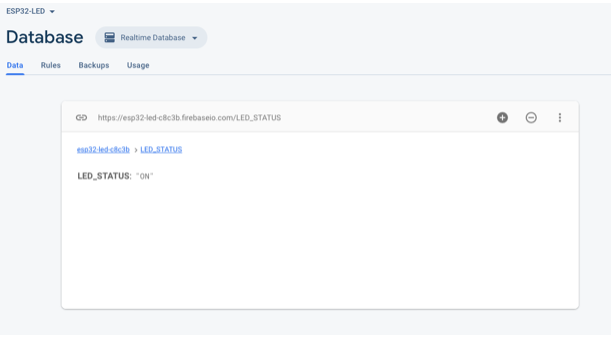
- I uploaded the code to the Huzzah. I then used the Firebase realtime database console to control the LED by manually switching the LED status between ON and OFF.
- First, I added Firebase to my app via the Web icon ().
- I recorded the auto-generated configuration code that I would later replace into a modified firebase configuration variable() on a new html page that would allow me to remotely control the LED on and off.
- I integrated the remote LED control features below. Toggling the ON/OFF buttons switches an LED in my room ON/OFF:
The image below shows the entire complete circuit:
The image below shows a screenshot of the Serial Monitor window:
Below is a video of the web browser and LED blinking as I toggle between on and off buttons:
Project 2: Remote Server
After learning how to build a web interface to control the ESP32 over a Local Area Network, I decided to try the second tutorial to learn how to talk to the ESP32 remotely. I decided to use Google Firebase for this. In what follows, I outline the steps I took to do this.
              #include                                  // esp32 library
#include                         // firebase library

#define FIREBASE_HOST "esp32-led-c8c3b.firebaseio.com"  // the project name address from firebase id
#define FIREBASE_AUTH "jZic7bMDi6Z7IjLvPBnt7yX4WfCPchUaWNXz4Znr"                          // the secret key generated from firebase
#define WIFI_SSID "Banks"                                // input your home or public wifi name
#define WIFI_PASSWORD "squatter92"                            // password of wifi ssid

String fireString = "";                                          // led status received from firebase
int ledpin = 5;

//Define FirebaseESP32 data object
FirebaseData firebaseData;

void setup() {
  Serial.begin(9600);
  delay(1000);
  pinMode(ledpin, OUTPUT);
  WiFi.begin(WIFI_SSID, WIFI_PASSWORD);                          // try to connect with wifi

  Serial.print("Connecting to ");
  Serial.print(WIFI_SSID);
  while (WiFi.status() != WL_CONNECTED) {
    Serial.print(".");
    delay(500);
  }

  Serial.println();
  Serial.print("Connected to ");
  Serial.println(WIFI_SSID);
  Serial.print("IP Address is : ");
  Serial.println(WiFi.localIP());                                // print local IP address
  Firebase.begin(FIREBASE_HOST, FIREBASE_AUTH);                  // connect to firebase
  Firebase.reconnectWiFi(true);
  Firebase.set(firebaseData, "/LED_STATUS", "OFF");              // set initial string of "OFF"
}

void loop() {

  Firebase.get(firebaseData, "/LED_STATUS");                     // get led status input from firebase
  fireString = firebaseData.stringData();                        // change to e.g. intData() or boolData()
  Serial.println(fireString);

  if (fireString == "ON") {                    // compare the input of led status received from firebase
    Serial.println("Led Turned ON");
    digitalWrite(ledpin, HIGH);                // make output led ON
  }

  else if (fireString == "OFF") {              // compare the input of led status received from firebase
    Serial.println("Led Turned OFF");
    digitalWrite(ledpin, LOW);                 // make output led OFF
  }

  else {
    Serial.println("Please send ON/OFF");
  }

  delay(1000);                                 // not strictly necessary
}
The image below is a screenshot of my realtime database console:
Next, I wanted to build a simple web interface to allow for smoother communication with the Huzzah instead of directly changing the inputs on the database console. I followed the below steps to create a new web app with the firebase database added.
PHYSCI 70: Introduction to Digital Fabrication
Below is a video of me using my remote web interface to communicate with the Huzzah via my phone.